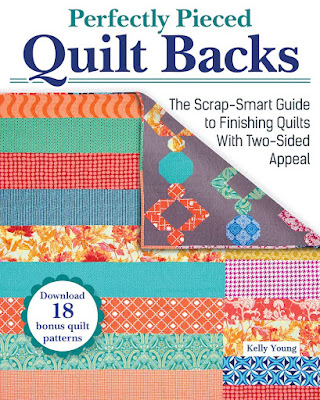
In today's post, we're taking a brand-new quilt book for a test drive: Perfectly Pieced Quilt Backs by Kelly Young, available here on Amazon. (Full disclosure: this post contains affiliate links, and I was provided with a free advance copy of this book so I could review it for you). Overachiever that I am, I made not one but TWO of the pieced backing projects in this book, and I will be using this book for a lot more than just quilt backings... I'll get to that later!
Initially I was interested in this book as a resource to keep in my office for the times when clients come to drop off a quilt for long arm quilting and their backing doesn't quite meet my minimum size requirements. I run into this issue a lot, especially with the charity quilting I do for the Outreach program of the Charlotte Quilters' Guild. When the volunteers on the Outreach team put fabric kits together for our members to take and sew, they often size the backing fabric just a few inches larger than the quit top should finish. That works great for guild members who are quilting on a domestic machine, but it doesn't give me the allowances I need for loading the backing onto the canvas leaders of my long arm frame. The first project I'm sharing from Kelly's book is the simplest one in there, and it was the perfect solution for enlarging a too-small backing for one of these guild outreach quilts.
First Pieced Backing: Walking Path
 |
| I Just Love How the Quilting Shows Up on the Plain Old Muslin Strip! |
I didn't have any leftovers from this patriotic themed quilt top to work with, so I just cut a wide strip of plain old boring muslin and inserted it into the original backing fabric following Kelly's instructions for the Walking Path backing. Once quilted, the muslin looks terrific. I just love how the quilting design that is completely lost against that busy navy print fabric springs to life on the muslin strip! That quilting design I used is Feathered Spirals E2E, designed by Jess Ziegler, stitched in So Fine 50 wt thread, color Snow, and I used the Pellon 80/20 With Scrim batting provided by my guild.
Here's the front of that quilt:
 |
| CQG Donation Quilt with Feathered Spiral E2E |
Isn't it pretty? I forgot to write down the dimensions of that quilt before I turned it in at our guild meeting for another member to bind. With the Americana themed fabric prints, this quilt will likely be given to a child who is hospitalized over the Independence Day holiday. Most of our donation kit quilts have very simple piecing, and the "walking path" pieced backing with a single contrast strip is a great choice for enlarging the backing without making it compete for attention with the quilt top. But, flipping through the book there were so many other fun ideas...
Second Pieced Backing: Every Little Bit/Coin Strip/Framed Orphan/Chunky!
 |
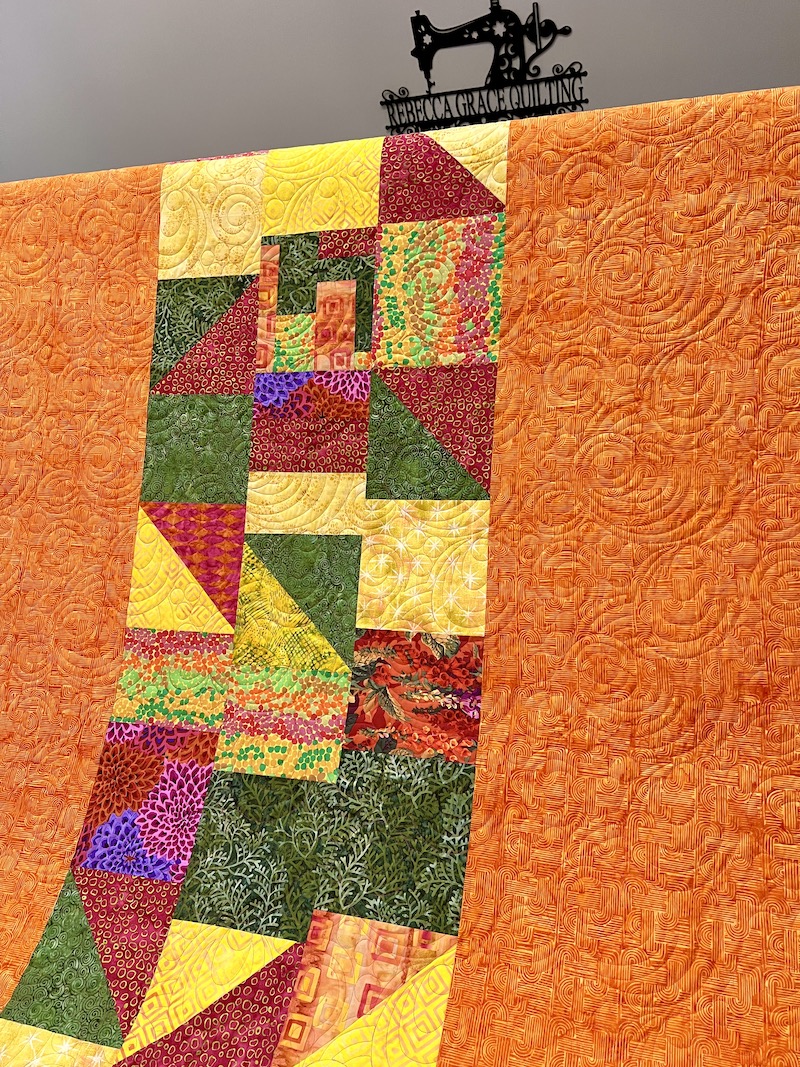
| My Pieced Backing for Judy, Combining Ideas From Several Projects In the Book |
Here's the front of Judy's quilt, a sun-drenched sizzler combing Kaffe Fassett prints with batiks. She calls it Tuscan Stroll because it reminds her of the glorious sunsets she experienced on a trip to Italy.
 |
| Judy's 78 x 94 Tuscan Scroll Quilt with Periwinkles and Pearls E2E |
If you decide to purchase Kelly's book (which you probably should do, for reasons I'll get to at the end of this post), I recommend reading through the whole thing at least once before choosing a backing project. Kelly shares great advice that gets you into the right mindset for making do with the scraps and yardage you have at hand rather than rushing out to a quilt shop to buy more fabric (which is how I usually handle my backings). Inevitably, the leftovers Judy gave me from her quilt top weren't exactly suited to following any of the individual project instructions, but I was able to combine ideas from four different projects in the book in a way that followed the spirit of Kelly's methods -- I used up the scraps and leftover blocks that would have otherwise added to Judy's scrap bin, added a little "something extra" as a surprise on the back of the quilt, and the main orange batik backing fabric (which is not one of the fabrics in the quilt top) was transformed into the absolutely ideal coordinating fabric when scraps from the quilt top were incorporated. And, most challenging for me personally, I kept it simple and did not spend a ridiculous amount of time piecing an overly complicated backing. It felt very freeing! Win, win, win!
 |
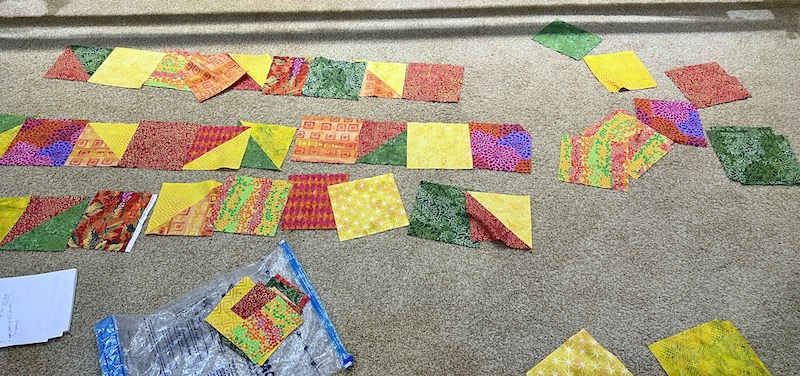
| Judy's Quilt Top Leftovers |
The leftovers I got from Judy's quilt top included LOTS of large HST (half square triangle) units and squares that hadn't made it into her final layout. Instead of just one "framed orphan" block, I decided to work all of the leftover HST blocks into her backing. I improv pieced one "every little bit" style block from smaller scraps for a little detail interest, and sliced some of the big squares into rectangles of varying widths like the "coin strip" project. Then I mixed all of these elements up and sewed them together like Kelly's "chunky" project for using up leftover scraps of random sizes.
 |
| Pieced Section Sewn and Pressed, Ready to Seam to the Orange Fabric |
I quilted Judy's quilt with the Periwinkles and Pearls E2E quilting design, using YLI 40 Tex Variegated Cotton Machine Quilting Thread in Maui Sunset. The batting I used is Quilters Dream Cotton Select.
 |
| Detail of Tuscan Stroll, Periwinkles and Pearls E2E Stitched in YLI 40 Tex Maui Sunset |
Here's what Judy's Tuscan Stroll quilt top looked like before quilting:
 |
| Judy's Tuscan Stroll Quilt Top Before Quilting |
And here's one more shot of the front after quilting. Judy usually does her own free motion quilting on a sit-down Bernina Q20 for her smaller quilts, but she's been experiencing shoulder pain when she tries to wrangle large quilts like this one on her sit-down machine. She chose this Periwinkles and Pearls E2E design because it has swirls and echoed curls similar to the free motion motifs she enjoys quilting freehand.
 |
| Tuscan Stroll Quilt with Periwinkles and Pearls E2E |
Back to the Book Review
Like I said, I initially thought this book would be great to have on hand for the times I'm asked to quilt something with a too-small backing. And yes, with 30 different pieced backing projects included, each one including instructions for multiple quilt sizes and easily customizable to odd-sized quilts, this book will definitely solve any last-minute backing shortage crisis in your quilting future.
When you purchase Perfectly Pieced Quilt Backs, you also get access to download the patterns for eighteen quilt tops featured in the book -- the "other side" of Kelly's backing projects. Usually equate "bonus patterns" with "rejects that didn't make it into the book," but seven out of the eighteen bonus patterns in this book are ones I would actually want to make (Folk Dance, Wave Runner, Filigree, Stems and Stones, Birthstones, Baubles, and Bubble Bath). If the bonus patterns had been sold separately in a companion book, it would have been worth it to me to buy that book.
But the real surprise for me is how much I like so many of Kelly's backing projects just as standalone quilts. Backing projects like Broken Rugby Stripe (pictured below), Checkerboard, Tunnel Vision, Focus Stripe, and Stash Rainbow are simple enough that you could literally cut and piece even a King size quilt in a single day, or a last-minute throw or baby quilt in a couple of hours. This book could be a huge time saver for those of you whose friends, relatives and coworkers all seem to be graduating, getting married and having babies faster than you can make quilts for them!
 |
| Broken Rugby Stripe Backing with Bonus Marquise Top |
The backing projects in this book would be great for simple quilts to show off those gorgeous large-scale print fabrics we quilters stash away and can't bear to cut up. Made up in solid fabrics, these "backing projects" would create beautiful quilts that would look amazing in modern and contemporary interiors. I am also seeing some of these simple pieced designs as ideal for those of you practicing free motion quilting or ruler work skills, "backing" projects that by themselves would make for terrific donation quilt projects... Backing projects like Cool Columns and Long and Short would make for beautiful, easy quilts from a precut collection of fat quarter or half yard cuts of coordinating print fabrics. I'm thinking about my own stash of Tula Pink, Anna Maria Horner, and Kaffe Fassett fabrics here!
Last but not least, the Framed Orphan backing project has seized my imagination for use as a quilt top instead of as a backing. I am thinking of those random workshop project UFOs I have crammed away in dark corners with no intention of finishing. At least, I have no intention of finishing the projects as intended by the workshop instructors. I take classes to learn new techniques, even if I don't particularly care for the class project. I love the way Kelly took one random leftover "orphan" block and surrounded it with a simple design of larger fabric pieces for this backing, and I can see this concept as a great way to turn my abandoned workshop blocks into useful finished quilts for baby shower gifts or for donation quilts. Again, this would be a great project for anyone practicing custom quilting skills as well. I must have used the word "simple" a hundred times in this blog post, but that's my biggest takeaway from Kelly's book: these ideas are so cute, so SIMPLE -- and yet I wouldn't have thought of them on my own because my brain is wired to make everything as complicated as possible. I'm so glad Kelly asked me to review this book.
A Couple Important Caveats
I know you guys trust me to give it to you straight, so there are a few potential pitfalls I want to warn you about.
- If you're making a pieced backing for a quilt that will be professionally long arm quilted, check with your own long arm quilter for his or her backing requirements and centering policies rather than relying on the information in this book. There are as many different long arm machines, frames, and loading system preferences out there as there are different methods for sewing HSTs or achieving quarter inch seams. Do not assume that your quilter will be willing or able to guarantee a perfectly centered pieced backing, especially with larger quilts, because you have to quilt from top to bottom on a frame instead of from the center out as you do on a domestic machine and the layers of the quilt shift slightly throughout the quilting process.
- Many of the backing projects in this book involve sewing long strips of fabric together in a process similar to adding borders to a quilt top. Kelly's directions instruct you to sew a long, uncut strip to a pieced section or to another strip of fabric and then trim the excess length after sewing. How well that method works for you depends on your experience, your sewing machine, and whether the quilting gods are smiling on you that day! If you are one of the lucky few who can sew flat, non-wavy borders without measuring or pinning, then go ahead and follow these instructions. Everyone else will get better results if you measure and cut the border/backing fabric strip first, pin it to the quilt top/pieced backing section, and THEN sew. The last thing you want to end up with is a pieced backing that "grows" and ends up wider at the top and bottom than it is in the middle! If you are dead set against measuring and pinning, then at least use your walking foot and/or your machine's dual feed (if available) and watch out for the tendency of the bottom layer of fabric to feed through the machine faster than the fabric on top. (If you happen to own one, you might want to try using a serger to piece some of these backing projects. You can adjust the differential feed on a serger if needed to eliminate any waviness.)
- Which brings me to my last Word of Warning: pieced quilt backings are not a great idea for beginner quilters. A quilt backing is the strong, stable skeleton that anchors and corrects for a multitude of imperfections in a typical quilt top. With a perfectly flat, square, and on-grain backing fabric, your long arm quilter can gently manipulate your imperfect quilt top during quilting to straighten out what's a little crooked and ease in areas of unintended fullness, and because the "corrected" quilt top is locked into position on a straight, flat and square backing fabric, it's going to remain straight, flat and square after quilting and throughout the life of the quilt. If you are at the point in your quilting journey where you are still struggling with wavy borders, quilt tops that come out more like trapezoids than rectangles, and "pouffy" spots that don't lie flat, you are likely to have the same issues with your pieced backing. You (or your long arm quilter) won't be able to see and deal with those issues in the pieced backing during quilting, and you're likely to end up with pleats and tucks quilted into the back of your quilt if your pieced backing doesn't lay nice and flat like yardage off a bolt.
- I said that was my last Word of Warning, but I just thought of one more! Pieced backings like the ones in this book are not going to be suitable for projects you plan to hand quilt. My long arm machine is powerful enough to stitch through multiple stacked seam allowances without a hiccup, but it would be absolute agony trying to push a hand quilting needle through the many places in a quilt where there's a seam allowance in the quilt top, then a layer of batting, and another bulky seam allowance in the pieced backing! Save your pieced backings for projects that will be machine quilted.
FRIDAY
Peacock Party at Wendy’s Quilts and More
Finished or Not Friday at Alycia Quilts
Off the Wall Friday at Nina Marie Sayre
Beauty Pageant at From Bolt to Beauty
TGIFF Thank Goodness It’s Finished Friday, rotates, schedule found here: TGIF Friday
SUNDAY
Frédérique at Quilting Patchwork Appliqué
Oh Scrap! at Quilting Is More Fun Than Housework
MONDAY
Design Wall Monday at Small Quilts and Doll Quilts
WEDNESDAY
Midweek Makers at Quilt Fabrication
Wednesday Wait Loss at The Inquiring Quilter
THURSDAY
Needle and Thread Thursday at My Quilt Infatuation
PSST!! I'd Love to Quilt for YOU!
By the way, if you or any of your quilty friends has a quilt top or two that needs quilting, I'd be delighted to quilt for you! I am currently scheduling quilts for completion in August of 2023. Click here to learn how easy it is to book a quilt with me!


What a fun quilt back! I look at pieced backs as a second front. . .the recipient could choose which side on which day to call the "front!" As a pieced back maker because I want to use up the scraps and as a domestic machine quilter, I can also quilt through all the "seams" you described. It isn't easy sometimes; but, it is worth the effort! Not adding scraps to the scrap bin is a win win for me! As for the centering business. . .I purposely make the design off center. . .I think it adds more interest that way.
ReplyDeleteWhat a beautiful finish!
Yes, Rebecca. We can always count on you to tell it like it is! Thanks for a great review of Kelly's new book and the warning to quilters who might be new or ones who prefer to hand quilt. LOVE that client quilt - front, back, AND the your beautiful stitching holding it all together!
ReplyDeleteRebecca those are wonderful projects, especially that Tuscan Scroll quilt - I gasped when I saw it! I like that you combined different backings. Beautiful work as always!
ReplyDeleteI loved pieced backings and more times than not, round up my leftovers into the backing rather than having to add to the overflowing scrap pile. I call these quilts ‘two’fers’. I get two quilts in one and quilting is half price! Oh no, should I say that to a long arm quilter? 🤭
ReplyDeleteI absolutely LOVE how the muslin shows up the quilting!!! Awesome! And a great pieced back!
ReplyDeleteWhat a thoughtful review! Love the sample backs you showed. What a great book to add to any collection! Thanks for sharing on my weekly show and tell, Wednesday Wait Loss.
ReplyDeletehttps://www.inquiringquilter.com/questions/2023/06/21/wednesday-wait-loss-333
Love this book and all the wonderful projects. You did 2 which is above and beyond the call. It is a great review and your caveats are important ones.
ReplyDeleteI was just going to say the same as Gail: I love how your quilting is showing on this back!
ReplyDeleteYou are an overachiever haha!! Both of those backs are beautiful - but the fronts are even better!! Go you!!!! And thanks for the tips at the end!!
ReplyDelete